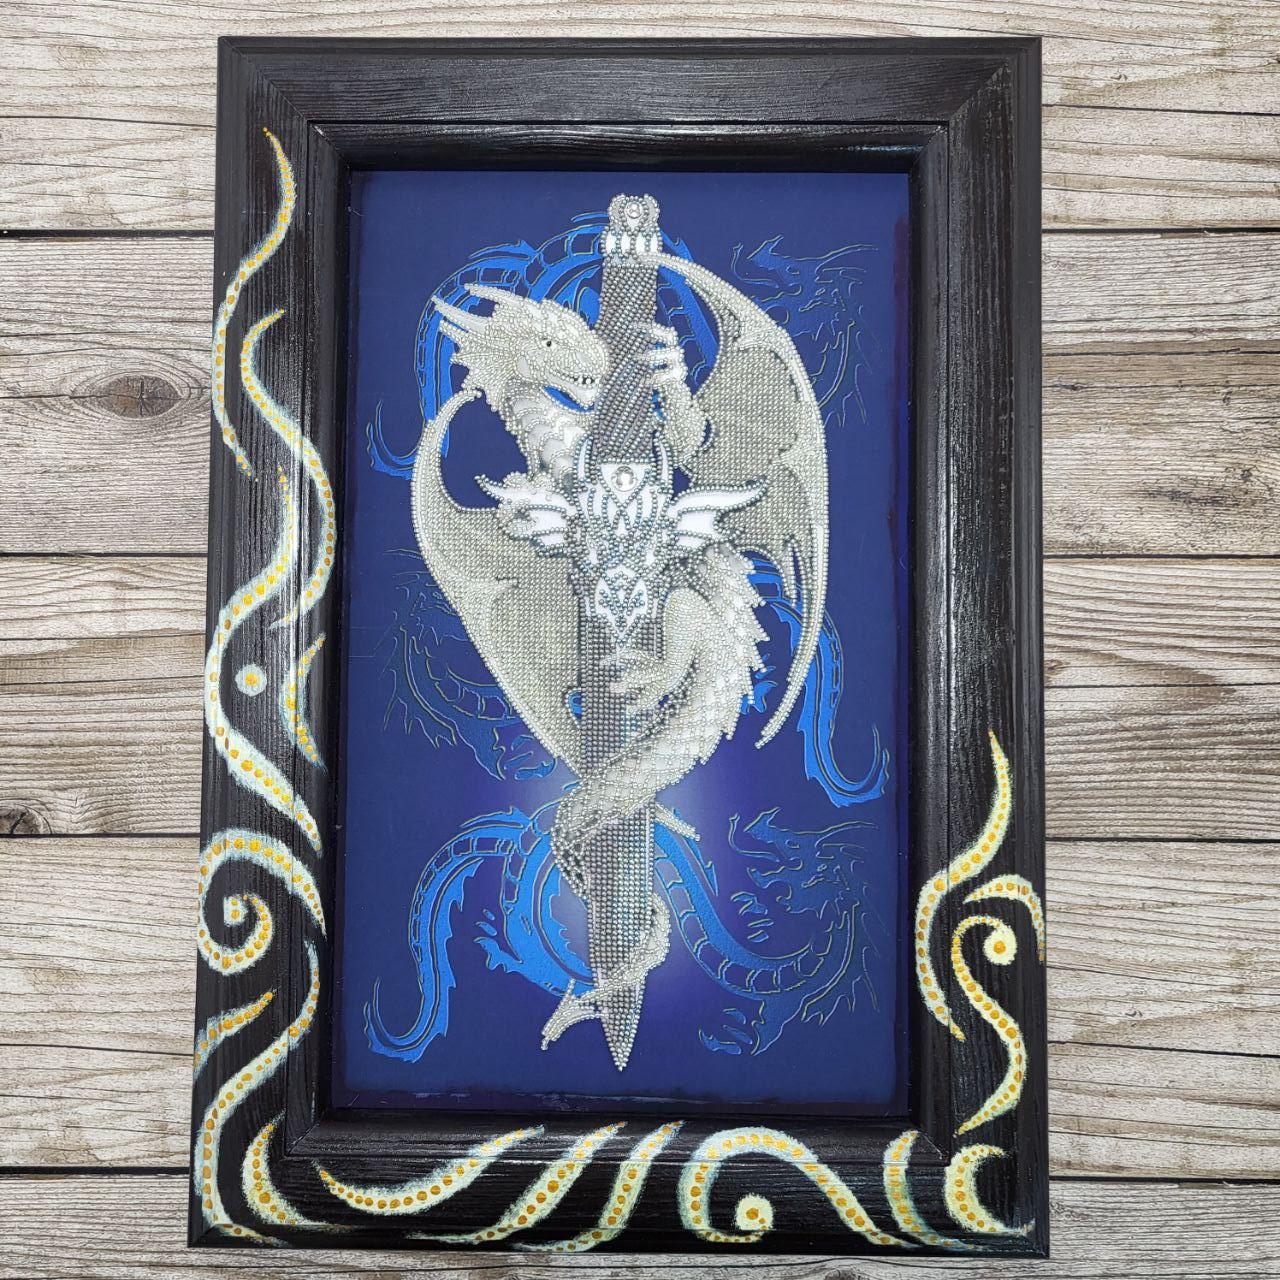
Welcome to the world of bead embroidery — a captivating craft that can turn everyday objects into masterpieces made with your own hands! If you are just starting out and wondering how to embroider with beads correctly, don't worry — in this article we will tell you in detail what to start with: from choosing the necessary materials and tools to mastering the essential embroidery techniques. Ready to dive into a creative adventure together? Let's go!
What You Need to Start Bead Embroidery
First and foremost, you will need:
2. High-quality, uniform seed beads.
3. Thread for bead embroidery.
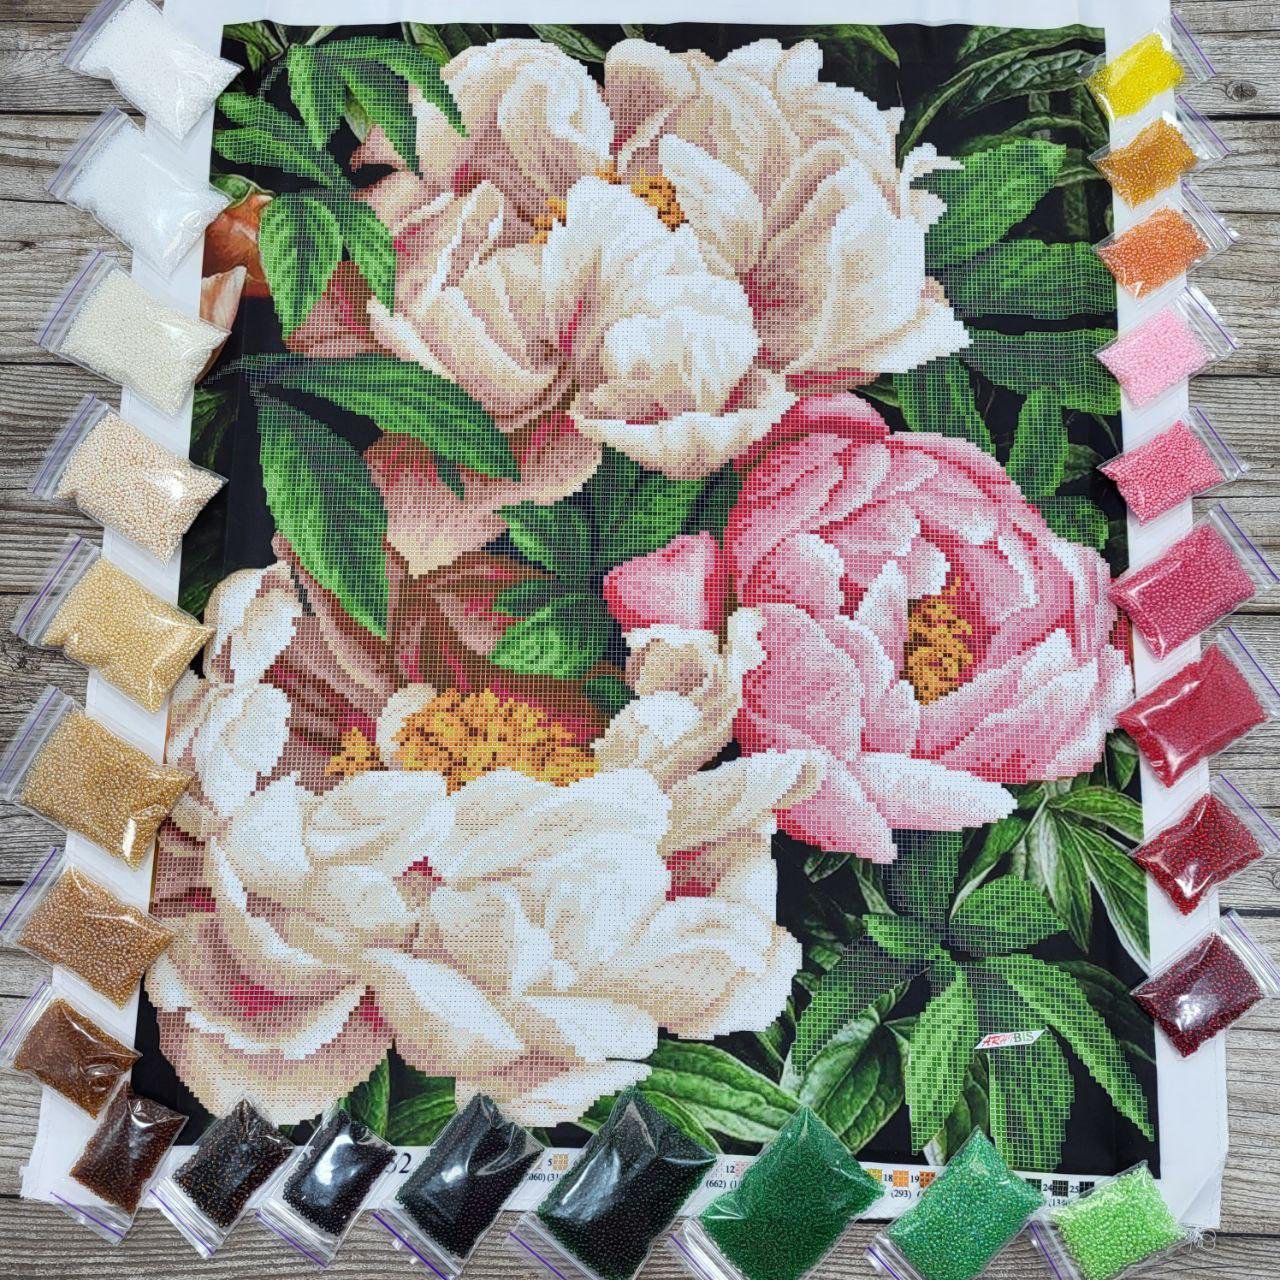
Pictured: bead embroidery kit for painting ZPK-052 Intoxicating Peonies
Let's take a closer look at each of these items.
The Base for Bead Embroidery
A bead embroidery blank is a fabric (gabardine, satin, etc.) printed with the embroidery pattern. Wooden and plastic blanks also exist; these usually come with the pattern printed on a separate sheet of paper. The pattern marks the needle entry points (small black dots) and coloured circles that indicate where to sew each bead by colour. Every pattern includes a key listing the colour symbols and the corresponding bead number for each symbol, along with the required number of beads of each colour counted in pieces or grams.
How to Choose Beads
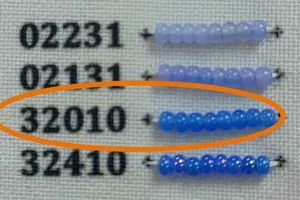
For embroidery, choose high-quality, uniform seed beads — this will give your finished piece a neat and beautiful look. The best option is top-grade Preciosa Czech seed beads in size 10/0. Select bead colours according to the numbers given in the pattern key. Preciosa bead numbers consist of 5 digits. If no bead numbers are listed in the key, it is better to seek advice from an experienced embroiderer or order a ready-made bead embroidery kit with a carefully matched bead selection. Choosing the colours on your own can be a daunting task for a beginner.
How to Choose Thread for Bead Embroidery
Many beginners struggle to figure out which thread is best for bead embroidery and whether ordinary sewing thread can be used. Let's sort it out!
Thread for bead embroidery must be strong — it should not fluff up, tangle, twist, or break.
Titan 100 thread was once widely used for bead embroidery, even though it was originally designed for sewing clothing, footwear, and other items requiring high tensile strength. However, its advantages are limited to strength alone — it fluffs up badly, making it difficult to thread through a needle eye. On top of that, it frequently tangles during embroidery and forms knots, complicating the process. These are also the reasons why ordinary sewing thread is not recommended for bead embroidery.
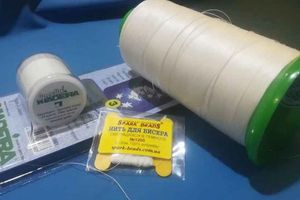
Many embroiderers are now switching to CORDEM 80 thread. It was developed by the Ukrainian factory Luts specifically for bead embroidery. This thread is free from the drawbacks of Titan — CORDEM has a slightly silky texture, so it barely tangles, and any knots that form are easy to undo. It stays intact and doesn't fluff up even if you pass its end through the needle eye several times. Using this thread will make your embroidery process comfortable, calm, and enjoyable.
Which Needle to Use for Bead Embroidery
An ordinary needle is not suitable for this craft. Bead embroidery requires special thin needles whose eye is small enough to pass through the tiny hole in a bead. Needles ranging from size №10 to №16 are suitable — the higher the number, the thinner the needle. Beading needles come in various lengths, from 3 to 12 cm. Choose a length based on whichever feels most comfortable to work with.
Is It Better to Embroider with Beads on a Hoop or Without One?
The choice between embroidering with beads on an embroidery hoop or without one depends on your personal preferences, the size of the project, and the material used. Both approaches have their advantages, so embroiderers simply pick whichever feels more comfortable for them.
During bead embroidery, the fabric tends to distort and pucker under the weight of the beads. To prevent puckering, it is better to stretch the fabric on an embroidery hoop — especially when embroidering a large bead picture (A3 format or larger) or a blank on satin.
Without a hoop, you can embroider small bead projects — formats from A7 to A4. Working without a hoop lets you freely manoeuvre the fabric and turn it as needed.
How to choose an embroidery hoop for bead embroidery:
1. Match the hoop size to your project, or choose an adjustable hoop. When doing bead embroidery, it is inconvenient to reposition the hoop to different areas of the picture, as the hoop can crush and crack the beads — so it is better not to use a hoop smaller than the picture itself.
2. Hoops can be made of wood, plastic, or other materials. Choose the material that feels most comfortable for you to work with.
3. Hoops can have different types of tension mechanisms that keep the fabric taut. Choose the mechanism that you find easiest to use.
4. Pay attention to the weight of the hoop, especially if you plan to work for extended periods. Use a hoop stand to avoid straining your hands.
5. Check the quality of the hoop — make sure it is well made, free of defects, and won't snag the fabric. Look up reviews of hoops from different brands and models.
6. To find the best option, we recommend experimenting with different types of embroidery hoops. This will help you understand which hoops are right for your needs.
What additional tools do you need for working with beads?
While embroidering, you may also find certain accessories helpful — ones that will make the stitching process much more comfortable. These accessories include:
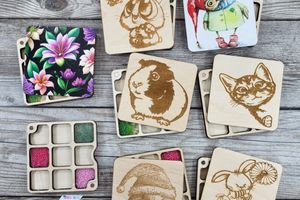
1. Wooden bead organisers are small boxes with compartments where you can sort beads by colour. They close with a lid secured by strong magnets, preventing the beads from spilling. They are a convenient way to store beads for your projects.
2. Scissors and thread snips for cutting thread.
3. Needle cases and needle magnets — so you don't lose your needle.
4. A thimble — to protect your fingers from accidental needle pricks.
5. A tacky bead mat — pour your beads onto it and, thanks to its tacky surface, they won't roll away, so it's convenient to use anywhere (stick it to your hand or to the hoop, or embroider on the sofa, in an armchair, and so on).
We recommend taking a look at our ready-made bead embroidery kits, which include everything you need: a bead embroidery blank, uniform Czech Preciosa seed beads, CORDEM 80 thread, and beading needles. It's a great solution for beginners, since the kit comes pre-assembled with all the high-quality materials you need, so you won't have to spend time choosing them yourself.
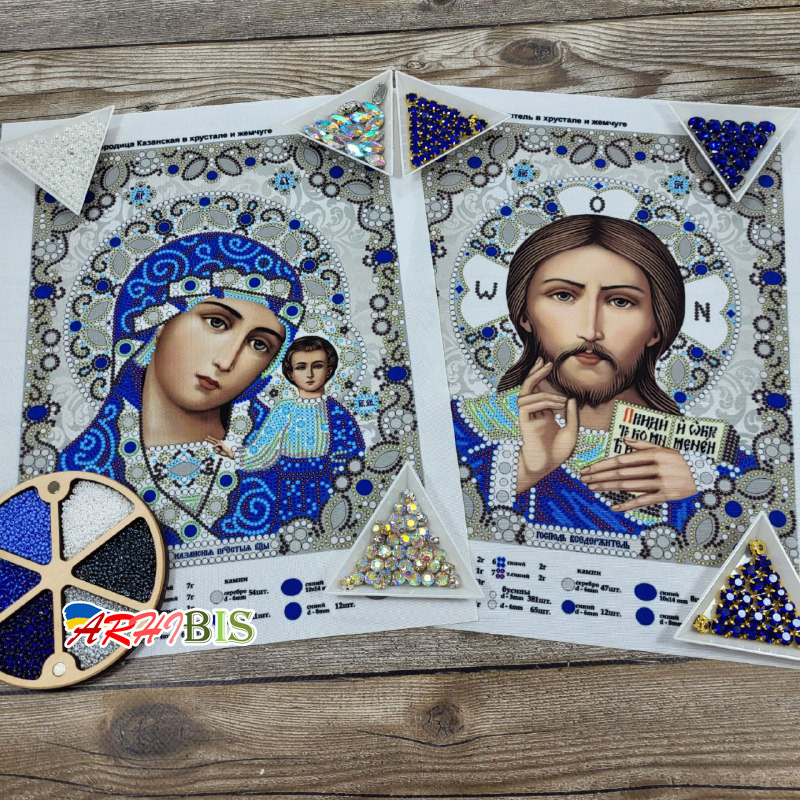
Pictured: bead embroidery kit for wedding icons ZhK-4003 and ZhK-4004
How to Start Bead Embroidery? How to Secure the Thread?
Many embroiderers wonder which is better when embroidering with beads: a single thread or a double thread? If you are using a strong thread such as Titan or CORDEM, you can confidently embroider with a single thread.
Some embroiderers worry that the thread may fray over time, which is why they choose to embroider with a double thread. If you are not making a picture or icon that will hang in a frame behind glass, but rather a bag, tote bag, wallet, or another accessory that will be in constant contact with harsh conditions — subject to friction and washing — then embroidering with a double thread gives extra security and keeps every bead firmly in place.
Where should you start stitching? You can begin bead embroidery from any spot that feels comfortable. There are no set rules or restrictions on where to begin or how to proceed. What matters most is that you enjoy the process, so simply start wherever feels right for you.
To see how to properly secure the thread at the beginning and end of your bead embroidery work — without any knots — watch our video:
Bead Embroidery Techniques
Bead embroidery uses the following techniques: the half-cross (monastery) stitch, bead satin stitch (back stitch), the arch stitch, the stem stitch, and the couching stitch.
The half-cross (monastery) stitch is the best bead embroidery technique for beginners, as it is the easiest to learn and execute. On a half-cross stitch bead embroidery pattern, beads are shown as small circles with black dots indicating where the needle enters and exits the fabric. Try to insert your needle precisely at the black dots on the pattern — this keeps the beads lying evenly at a consistent angle, giving your embroidery a neater finish.
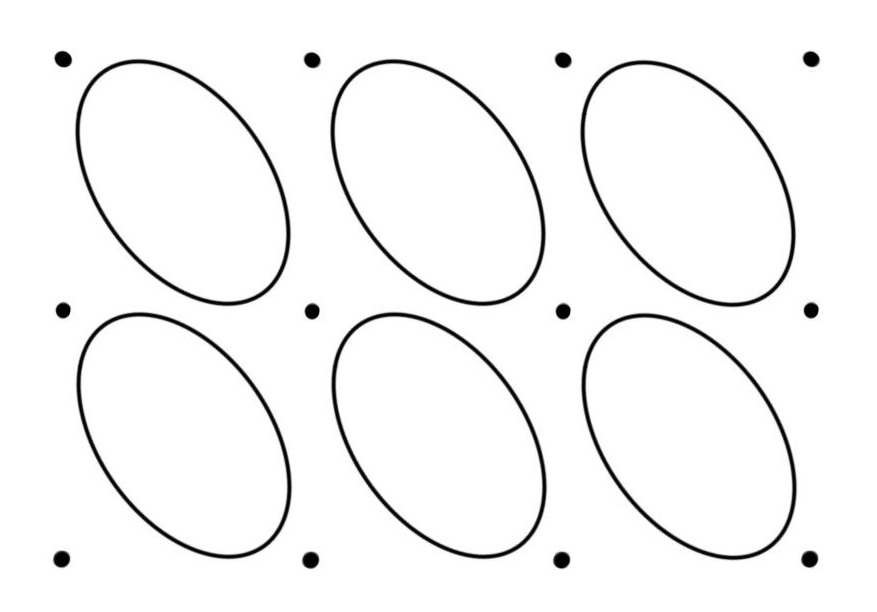
To begin, thread the needle and secure the thread on the wrong side of the fabric as shown in the video above. Bring the needle out to the right side at the lower left corner of a circle on the pattern, thread one bead onto it, and make a diagonal stitch up to the upper right corner. Bring the needle through to the wrong side, then make a vertical stitch downward so the needle emerges on the right side at the lower left corner of the next circle. Thread the next bead, make another diagonal stitch, then a vertical stitch on the back. Repeat.
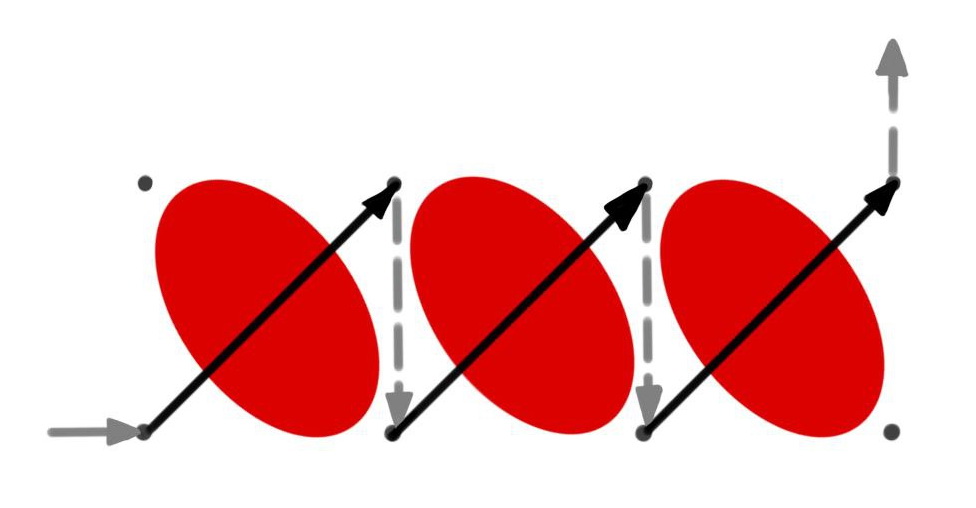
At the end of a row, move to the next one without cutting the thread — simply pass the needle vertically upward along the wrong side of the fabric. Embroider the next row using the same method but in the opposite direction.
Make sure the thread is not pulled too tight, as this can cause the fabric to pucker and the work to distort. At the same time, keep enough tension so the beads do not sag. For extra security, you can stitch through the first and last bead of each row twice.
For a detailed guide on how to embroider with beads using the half-cross (monastery) stitch, watch our beginner masterclass:
You may also find it helpful to watch our video tutorial on how to move from row to row when embroidering with beads:
Bead satin stitch, or the "back stitch". Beads on the pattern are shown as ovals with black dots between them (indicating needle entry points).
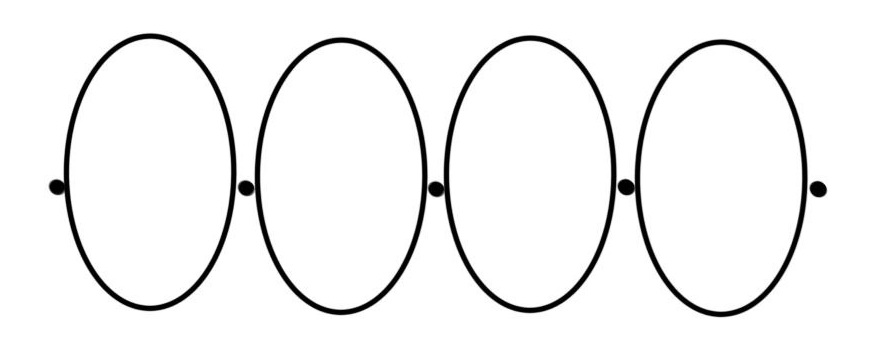
Secure the thread and bring the needle out to the right side just after the bead symbol, thread one bead, and insert the needle just before the symbol, pulling the thread taut. Then bring the needle out to the right side just after the symbol for the next bead, thread a bead, and insert the needle just before that symbol. Repeat these steps to complete the row.
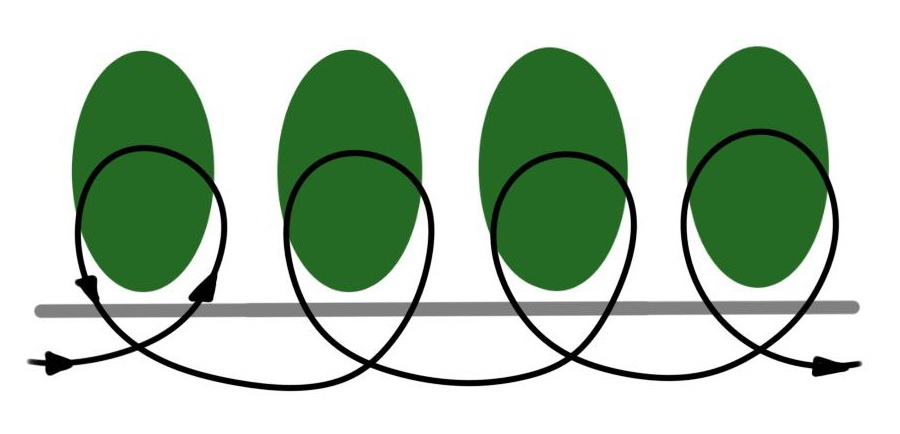
The stem stitch is used as an alternative to the back stitch, and results in beads lying closer together and more evenly.
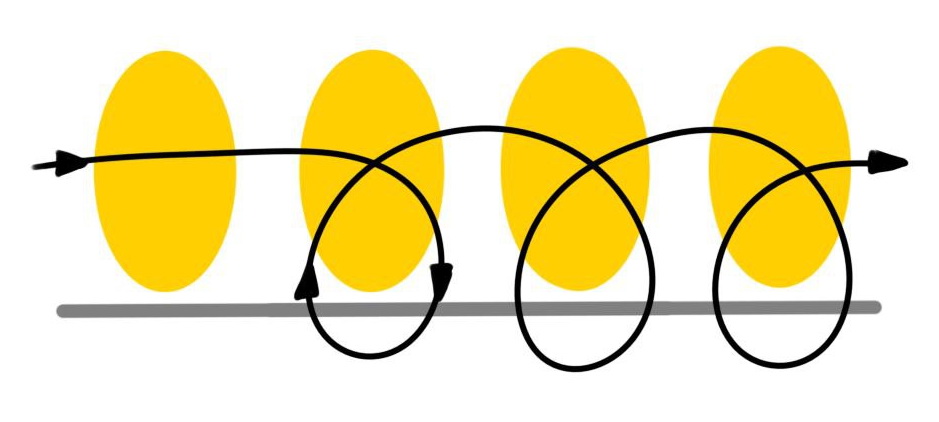
Secure the thread and bring the needle out to the right side just before the first bead symbol. Thread two beads, insert the needle into the fabric just behind the symbol for the second bead, and bring it out on the wrong side. Next, bring the needle up between the two sewn-on beads on the right side, pass the needle back through the last bead sewn, and thread one more bead. Bring the needle to the wrong side just after the symbol for the next bead. Then bring the needle back out to the right side between the two sewn-on beads, pass through the last bead, and thread one more bead. Insert the needle into the fabric one oval further along the pattern and bring it out on the wrong side. Continue in the same manner.
The arch stitch is used as an alternative to the back stitch when beads don't need to lie flat against the fabric, or when a more flexible, less stiff result is desired.
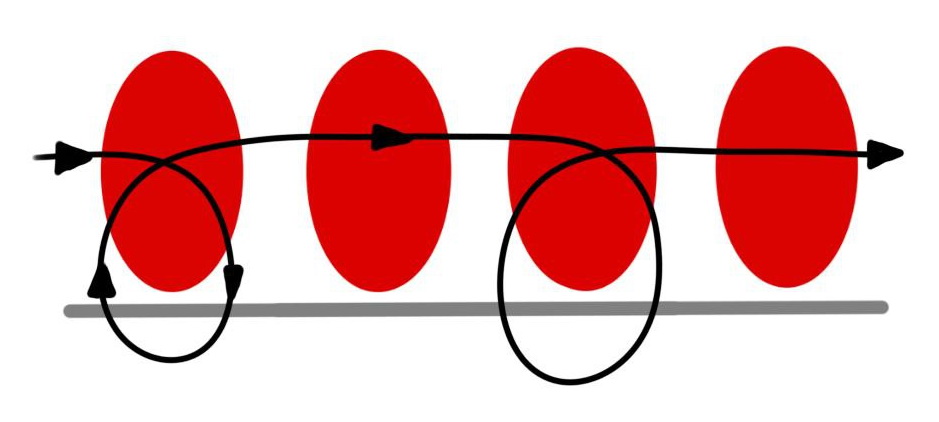
For each stitch on the right side, thread several beads onto the needle, but attach only the one that falls at the intersection of stitches to the fabric. In execution, the arch stitch is similar to the stem stitch, except that 2–4 beads are threaded onto the needle at once.
The couching stitch is used when the needle cannot pass through the hole in the beads, to avoid constantly unthreading and re-threading the needle (for example, when embroidering with micro beads).
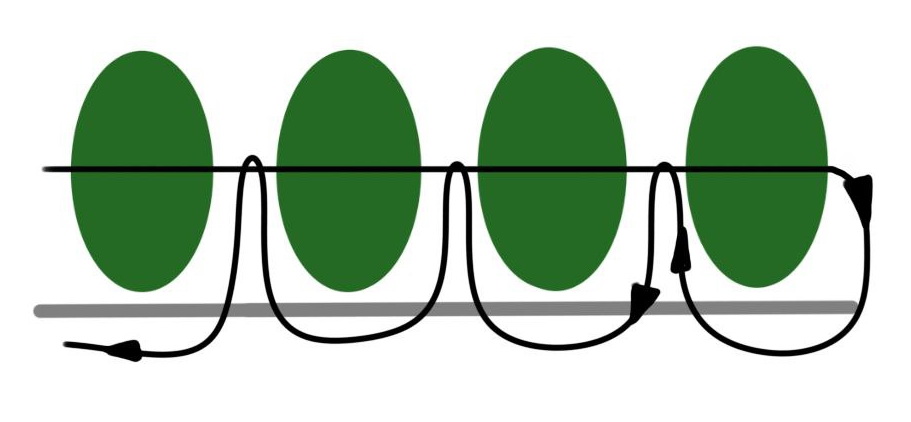
Thread the beads onto a length of thread, lay it along the design line, and secure it with small perpendicular stitches. Bring the needle up to the right side of the fabric between beads, pass it over the laid thread, insert the needle back into the fabric at the same point, and bring it out on the wrong side. Couching stitches can be placed every 2–3 beads.
For a better understanding of how to embroider with beads using different techniques, we recommend watching our step-by-step beginner masterclass:
Circular bead embroidery technique — circular and spiral elements on patterns are shown as circles without the dots that mark needle entry and exit points. The back stitch, stem stitch, arch stitch, and couching stitch are all suitable for working these elements. When embroidering in a spiral, it is recommended to start from the centre and work outward to the outer edge. "What is the most popular embroidery technique?" — you might ask. It's hard to say: some people embroider exclusively with the circular technique because that's what they love. Others swear by the half-cross stitch — one of the easiest methods and the most common starting point for learning bead embroidery.
Techniques for Sewing On Decorative Elements
Embroidery projects often feature not just seed beads but also other decorative elements such as rhinestones, large beads, sequins, and more. These elements enhance the look of a project, adding uniqueness and originality. That is why this article also covers techniques for sewing on various types of decorative embellishments.
Large beads and pearls are sewn on in the same way as seed beads. The following stitches work well for attaching these elements: backstitch, stem stitch, arch stitch, and couching stitch.
Flat-back rhinestones each have two holes through which they are stitched to the fabric. Secure the thread on the wrong side, bring the needle through to the right side, pass it through one hole in the rhinestone, and bring it back out to the wrong side close to where the needle first emerged. It is best to stitch through each hole twice for a more secure hold. A clear monofilament thread can be used for sewing on rhinestones, as it does not need to be colour-matched to the fabric — it is simply invisible.
Rhinestones in prong settings have a metal mount and are sewn on as follows: secure the thread on the wrong side, bring the needle through to the right side at one side of the rhinestone's marked position on the pattern, pass the needle through one hole in the mount and out through the hole on the opposite side of the mount, then insert the needle on the other side of the marked position and bring it through to the wrong side. It is best to stitch through each rhinestone twice for a more secure hold. If the mount has four holes, you can stitch through it in a cross pattern.
What to Do After Finishing Your Embroidery
Once you have finished your embroidery, there are several options for what you can do with the completed piece:
1. Frame it beautifully so you can hang it on the wall or display it on a shelf.
2. Small embroidered pictures or motifs can be used to embellish clothing, bags, decorative cushions, and other accessories.
3. Embroidered pieces make wonderful gifts for friends, family members, and colleagues.
4. If you have many small embroideries, you can compile a sample album of your work. This lets you track your progress and share it with others.
5. Consider selling your embroideries. Finished pieces can be sold through online platforms, at markets, or at needlework fairs.
Whatever you choose, the most important thing is to enjoy the embroidery process and take pride in what you create!